

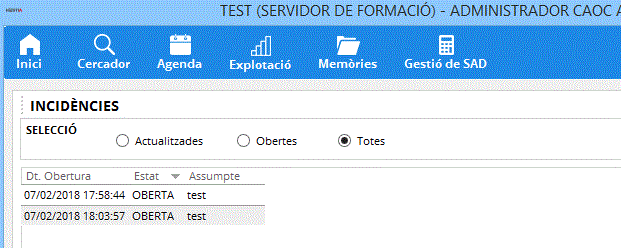
On the home screen is the program's incident management window. It is used to consult all open incidents, both those that are pending resolution and those that have already been concluded and archived. The list of incidents is filtered according to the selected option:
- Updated : Shows the incidents in the resolution process that have received a response from the support team.
- Open : shows incidents that are in the process of being resolved by the support team.
- All : Shows all incidents you've created over time, including resolved and archived incidents.
To open an incident :
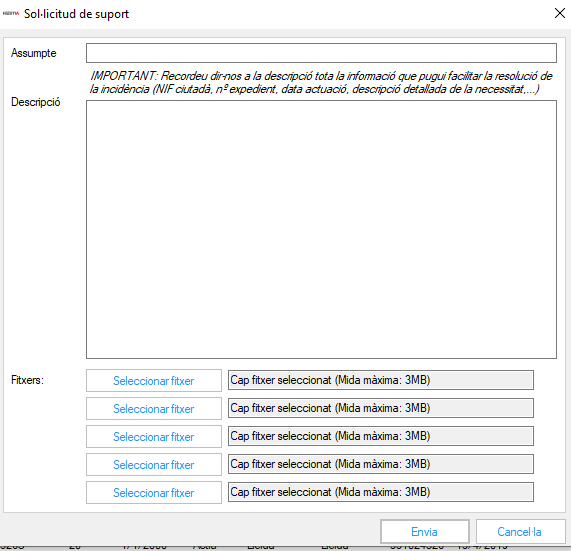
the button ![]() located at the far right of the main navigation bar, opens the form that allows you to submit a new incident.
located at the far right of the main navigation bar, opens the form that allows you to submit a new incident.
- "Subject" enter a very brief and as clear as possible description of the problem or query.
- "Description" is where the full explanation is written, providing as much information as possible in order to facilitate the support task and speed up the resolution of the incident (example: file number, citizen's ID (in case it is not informed, first and last name), in case of actions, problems, etc... specific date, or scope and topic).
- You can also attach files or screenshots that make it easier for Hestia's support technicians to understand the incident.
By pressing the "Send" button, the incident is opened and sent to the remote user support service.
To consult an incident , including all comments and responses, both at the user level and at the support service level, just press the corresponding "View" button.
In the incident detail window you will find the following information:
- ID: incident number
- Status: at what point of resolution is the incident
- Subject : brief description of the incident
- Date: Date the message was sent
- Origin: User or Support, as appropriate
- Status (detail): Shows whether there has been a status change for the incident
- Text : content of the message sent or received
To respond to an incident :
To respond to an incident, you must open it using the "View" button on the home screen. The response message is written in the "Send response" box, located at the bottom of the window and, by clicking the "Send" button, the response is recorded in the incident system and the message is sent to the service of support

To close an incident :
Incidents move to the "Resolved" state when the support service resolves the problem that caused the incident.
The professional can close the incident by selecting "Yes" in the "Close Incident" box before sending a response message. In this case the status changes to "Closed (User)".
Closed incidents are archived and no further responses can be added to them, regardless of whether they were closed at the user level or by support.
